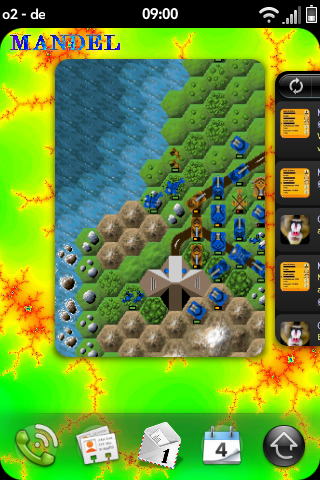
#WebOS-HowTo: Make your 2D SDL app @Palm Pixi compatible
WebOS in the current version of 1.4.5 has a bug regarding 2D-SDL rendering.
Normally, you would create a SDL_Surface, render your object on it and update the screen with help of SDL_Flip() or SDL_UpdateRect() call. This doesn’t really work on a Pixi: The app works for some seconds and then the screen stops updating.
The only screen update path which works reliable on a Pixi is OpenGL. And therefore this is the way you need to go to bypass this bug.
Using your SDL-Surface as a texture map on a full screen box in OpenGL sounds not very complicated but there are several pitfalls on the way the screen. In the following example I’ll use OpenGLES1.1.
1. We need the correct includes and libraries:
	#include <GLES/gl.h>
	#include <GLES/glext.h>
-lGLES_CM
2. We need to setup SDL, PDL and OpenGL.
	// Initialize the SDL library with the Video subsystem
	SDL_Init(SDL_INIT_VIDEO | SDL_INIT_NOPARACHUTE);
	atexit(SDL_Quit);

	// start the PDL library
	PDL_Init(0);
	atexit(PDL_Quit);

	PDL_SetOrientation(PDL_ORIENTATION_270);

	PDL_GetScreenMetrics(&outMetrics);

	// Tell it to use OpenGL version 1.0
	SDL_GL_SetAttribute(SDL_GL_CONTEXT_MAJOR_VERSION, 1);
	SDL_GL_SetAttribute( SDL_GL_DOUBLEBUFFER, 1);

	// Set the video mode to full screen
	Surface = SDL_SetVideoMode(outMetrics.verticalPixels, outMetrics.horizontalPixels, 0, SDL_OPENGL);

	// this is our SDL_Surface which we then use to create the Texture from
	// notice the size of 512 x 512 pixels. Textures has to have a size of 2^x per dimension.
	// We will later only draw in a part of this texture and take care to move and rotate this part into the viewport.
	Render = CreateSurface(0, 512, 512);

	// setup openGL: 2D orthogonal projection
	glClearColor(0.0f, 0.0f, 0.0f, 0.0f);
	glViewport( 0, 0, outMetrics.horizontalPixels, outMetrics.verticalPixels );
	glMatrixMode(GL_PROJECTION);
	glLoadIdentity();
	glOrthof(0, outMetrics.horizontalPixels, outMetrics.verticalPixels, 0, -1, 1);

	glMatrixMode(GL_MODELVIEW);
	glLoadIdentity();
	// here we rotate the model to fit in the viewport and move the origin to see it
	glRotatef(90, 0, 0, 1);
	glTranslatef(0, -outMetrics.horizontalPixels, 0);

	// enable 2D textures, vertex arrays, texture arrays and disable depth test
	glEnable( GL_TEXTURE_2D );
	glEnableClientState(GL_VERTEX_ARRAY);
	glEnableClientState(GL_TEXTURE_COORD_ARRAY);
	glDisable(GL_DEPTH_TEST);

	// create the texture id and use it as active texture for the whole app
	glGenTextures(1, &texture);
	glBindTexture(GL_TEXTURE_2D, texture);
3. Now we do the rendering on the SDL_Surface.
Usually we would just render directly on the display surface (the one called Surface in the code above). But we need to create the texture in the size of 2^x
therefore we render on your offscreen surface, called Render above. We render our objects in the upper left part of the surface.
4. Convert the surface into a texture and render our rectangle with this texture mapped on.
	int mode;

	// clear the buffers
	glClear (GL_COLOR_BUFFER_BIT | GL_DEPTH_BUFFER_BIT);

	// we can deal with 2 different display modes here
	if (surface->format->BytesPerPixel == 3) { // RGB 24bit
		mode = GL_RGB;
	} else if (surface->format->BytesPerPixel == 4) { // RGBA 32bit
		mode = GL_RGBA;
	}
	glTexParameterf(GL_TEXTURE_2D, GL_TEXTURE_MIN_FILTER, GL_LINEAR);
	glTexParameterf(GL_TEXTURE_2D, GL_TEXTURE_MAG_FILTER, GL_LINEAR);
	// convert our offscreen surface into a texture
	glTexImage2D(GL_TEXTURE_2D, 0, mode, surface->w, surface->h, 0, mode, GL_UNSIGNED_BYTE, surface->pixels);

	// coordinates for the rectangle and how the texture coordinates fit on it
	GLfloat box[] = {0,surface->h,0, surface->w,surface->h,0, surface->w,0,0, 0,0,0};
	GLfloat tex[] = {0,1, 1,1, 1,0, 0,0};
	glVertexPointer(3, GL_FLOAT, 0, box);
	glTexCoordPointer(2, GL_FLOAT, 0, tex);
	// draw it
	glDrawArrays(GL_TRIANGLE_FAN, 0, 4);

	// empty caches
	glFlush ();
5. Take care about screen update.
SDL_GL_SwapBuffers();
One more point:
You will notice that the mouse coordinates you get in your event handler are still in portrait, regardless of the landscape mode
That’s it.

Don’t forget to check out some of my free apps:
 September 19, 2010
·
  admin ·
  No Comments
 Posted in: Developing

Leave a Reply
You must be logged in to post a comment.